Saturday, October 20, 2007

Python Scripting Tutorial, Part two

Here is my second part of the hands on tutorial on basic python script. It works in an interactive mode just like adduser on a linux system, only
it sets a very strong random password (using a little utility called pwgen - you can install it from /usr/ports/sysutils/pwgen2) for the user, gives you
the ability of making a system user, a ftp user or both. My pure-ftpd is based on MySQL table auth. It also makes a public_html for the user and
build a virtual host for the user. Check the script out because I think it is pretty straightforward. Tweak it a bit so you can use it as your own.
On the next tutorial we'll the users a mail with the password and also add them to an LDAP directory.
PS: I'm aware that some things could be done more easily by using hefty tricks, but hey, I aimed for easy understanding.


#/usr/local/bin/python

import os
import getopt
import sys
import MySQLdb

# Where should i write the vhost details?
VHOSTS_CONFIG = "/usr/local/etc/apache22/extra/httpd-vhosts.conf"

# Init the variables
user_flag = -1
ftp_flag = -1

# MySQL authentification variables
mysql_user = "user"
mysql_pass = "password"
mysql_host = "localhost"
mysql_database = "pureftpd"

# The usage() function that gets used when we call the script with the -h option
def usage():
print """
Usage: sudo python create_python.py : create a user in the system.
You can create a ftp user only, a system user or both.
It also adds the corresponding vhost to the configuration and builds the
home directory. If run with no arguments it will go into interactive mode.

create_user.py [-h]

-h print this help
"""

# Parse the command line arguments
# Basicly this looks for the -h argument only but could be
# easily extended to something else

o, a = getopt.getopt(sys.argv[1:], 'h')
opts = {}
for k,v in o:
opts[k] = v
if opts.has_key('-h'):
usage();
sys.exit(0)

# Check to see if we're running as superuser
uid = `os.getuid()`
if uid != "0":
print "You must be superuser in order to run this program"
sys.exit(1)

# Make a system user?
user_input = raw_input("Do you want to add a system user [n/Y]: ")
if user_input.lower() == "y":
user_flag = 1
if user_input.lower() == "n":
user_flag = 0
else:
user_flag = 1

# Make a ftp user?
ftp_input = raw_input("Do you want to add a ftp user [n/Y]: ")
if ftp_input.lower() == "y":
ftp_flag = 1
if ftp_input.lower() == "n":
ftp_flag = 0
else:
ftp_flag = 1

# If you do not want a system user or a ftp user then ... you don't want anything
if ftp_flag == 0 and user_flag == 0:
print "Come back when you know what you want"
sys.exit()

# How do you want to name your user?
user_name = raw_input("Username: ")

# Try to figure out the shell or input another shell
# something like /usr/local/bin/rssh
if user_flag == 1:
user_shell = raw_input("Shell [/usr/local/bin/bash]: ")
# Make /usr/local/bin/bash the default shell if the user presses enter
if user_shell == "":
user_shell = "/usr/local/bin/bash"

# Basicly we have to types of accounts
# Those that are the system users with ssh account and those with only ftp access
# System users have the /home/user directory
# whilst the ftp users have /home/ftpusers/user

if user_flag == 1:
home = "/home/" + user_name
else:
home = "/home/ftpusers/" + user_name

# But if you want you can input another directory as the home directory
# We are making this script a little more interactive
home_dir = raw_input("Home directory [" + home + "]: ")
if home_dir == "":
home_dir = home

# We generate a new random password. This is based on the pwgen port
# Please install it before if you don't have it:
# cd /usr/ports/sysutils/pwgen2 && sudo make search install
newpassword = os.popen("pwgen -s -n -B -c 12 1").readline().split()[-1]
if user_flag == 1:
# Add the new user using the randomly generated password earlier
# This command enters:
# echo pass | pw user add -d /home/user -m -s /usr/local/bin/bash -n user -g users -h 0
# -d - home directory
# -m - builds the home directory if it doesn't exist
# -s - the shell to user
# -n - the name of the user
# -g - the original group for the user
# -h 0 - get the password from stdin
cmd = "echo " + newpassword + " | pw user add -d " + home_dir + " -m -s " + user_shell + " -n " + user_name + " -g users -h 0"
os.system(cmd)
# Save the new password somewhere as you don't want an inactive account or manually input another pasword
f = open("/root/accounts", "a+")
line = user_name + " " + newpassword + " " + `user_flag` + " " + `ftp_flag` + "\n"
f.write(line)
f.close()
print "Details have been saved to /root/accounts. Please mail the information to the user and then delete the file"
# Make the /home/user/public_html directory so the user can have his own web server
# at the http://host/~user address
os.mkdir(home_dir + "/public_html")
# Change the vhost configuration to a new entry so
# http://host/~user is mapped as http://user.host/
# This is much more professional in my opinion
f = open(VHOSTS_CONFIG, "a")
vhost = """<VirtualHost *:80>
ServerAdmin email@mail.com
DocumentRoot """ + home_dir + """/public_html
ServerName """ + user_name + """.host
ErrorLog /var/log/httpd/""" + user_name + """-error_log
CustomLog /var/log/httpd/""" + user_name + """-access_log combined
</VirtualHost>
"""
f.write(vhost)
f.close()
# Restart the Apache Webserver
os.system("apachectl graceful")
# For the ftp users only you should manage their accounts using the system account ftpusers
if user_flag == 0 and ftp_flag == 1:
group = "ftpusers"
uid = "ftpusers"
else:
uid = user_name
group = "users"
# Add the ftp user to the existing MySQL table (I do MySQL auth to my ftp server)
# with the same use
so if you give ftp access to a system user he can login with
# the same password
You should only give a user access to the system with no ftp
# access if you want him to make transactions
only with ssh (through scp)
if ftp_flag == 1:
# Open the MySQL database
db = MySQLdb.connect(mysql_host,mysql_user,mysql_pass,mysql_database)
# Make a cursor (a pointer to that database)
cursor = db.cursor()
# Execute an insert query
cursor.execute("INSERT INTO `pureftpd`.`users` (`User`, `Password`, `Uid`, `Gid`, `Dir`, `QuotaSize`) VALUES (\'%s', MD5(\'%s\'), \'%s\', \'%s\', \'%s\', \'%s\');" % (user_name,newpassword,uid,group,home_dir,100))
cursor.close()
if ftp_flag == 1 and user_flag == 0:
os.mkdir(home_dir)


Powered by ScribeFire.
Monday, October 15, 2007

Solved the PHP Segmentation Fault

Ha. I figured it all out. After some exhausting work my apache+php installation is working okay.
What I did is comment all lines in /usr/local/etc/php/extensions.ini and then uncommented line by line and testing php over and over again in cli mode. This took about 15 minutes of RSI-proof work. My error was due to the recode extension. I just commented the line and everything works okay. Unfortunately, reinstalling the extension just won't do the trick. As I see, there are some topics on this to be found on google but none have a solution. I'll have to look into it.

Note to self: Stop installing every god damn tidbit in extensions. Use only what necessary fool!

PHP annoying error

I just installed apache on a new box using freebsd. Everything seems to work just fine. But i then tried to install php5 and php5 extensions and apache won't even start. /var/log/messages says something about a segmentation fault. php in the command line says core dumped. I'm getting frustated as this is surely an error related to the updated ports collection I have (as everything worked perfectly a few weeks ago).

Saturday, October 13, 2007

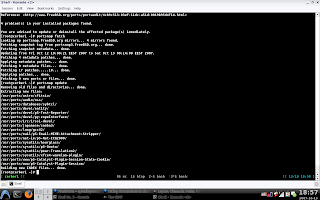
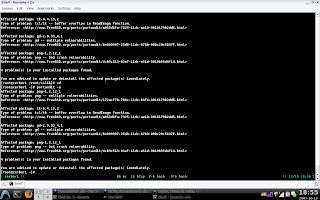
How to keep your FreeBSD box up to date

Here is a quick but time-consuming way of keeping your ports up to date. First we will install portaudit to see what ports need upgrading because of vulnerability issues. Than we will install portupgrade which is a program for upgrading your system.

Portaudit
portaudit provides a system to check if installed ports are listed in a
database of published security vulnerabilities.
cd /usr/ports/ports-mgmt/portaudit
make install clean
portaudit -Fda


Portupgrade
Portupgrade is a tool to upgrade installed packages via ports or
packages. You can upgrade installed packages without having to
reinstall depending or dependent packages. It can automatically trace
dependency chains up and down upgrading packages recursively.
cd /usr/ports/ports-mgmt/portupgrade
make install clean

Let's now update the ports collection using the built in portsnap.

portsnap fetch
portsnap update


After your ports collection update is completed you should run the following command and building a new database for the portupgrade program. Beware as this takes a LOT.

portsdb -Uu

The actual upgrading is done with:

portupgrade -arR

By the way to see what packages are outdated type at the command prompt:
pkg_version -l "<"

That's it. You should now have an up to date system. All you need to do now is automate this task by adding all the commands in a shell file and throwing it at cron.

Sunday, October 7, 2007

How-to: Make Firefox default browser for Thunderbird

One thing that bugged the hell out of me was the fact that Thunderbird did not know about Firefox. I get a lot of RSS feeds in my inbox and the damn things just won't open. So what you say? "You just click the link and magically Firefox starts with a new tab and the most sought after page". Wrong. What you have to do is ctrl-click the link, click on "copy link location", do an alt-tab, paste the link in firefox and then press enter while you are controlling yourself from pounding every object that's on your desk . I mean, how hard can it be for the great Mozilla Foundation to integrate the two seamlessly and without any tweaks in the configs? Don't get me wrong. I do love their products. But in my opinion this is one of those cases where some polish (sorry Poland people) will come in handy. So, until they came up for a better way of selecting a default browser here is the way to go:

  • Fire up Thunderbird.
  • Go to Edit - Preferences - Advanced - General - Config editor
  • Make a new string network.protocol-handler.app.http with /opt/mozilla/bin/firefox
  • Same for network.protocol-handler.app.http - /opt/mozilla/bin/firefox

Who in their right mind will use the same application for https and http anyway? Sheesh. Strange f*cking world we're leaving in. :)


Powered by ScribeFire.

Friday, October 5, 2007

Python Scripting Tutorial, Part one

Introduction

Python is a great tool to work with. I like the fact that I can accomplish all sorts of tasks, from socket programming to web development to GUI) in just one language. Python has an incredible standard library, it is very readable and I found it to be very fast. I prefer it over BASH because it seems I just can make the damn thing work.

In this series, we'll first start on with some very simple scripts and then move on, developing on those and adding more features. This is a hands-on tutorial, because you have to write the code and try to understand it. As I always comment my code excessively when writing tutorials, I won't explain the same thing twice.

In this part you will learn how to:
  • find out if a program is running by searching for its pid
  • get simple command line arguments
  • learn what a list is and how to access it
Scenario

As you may already know, I have moved my sshd port to 8722 on my servers (they are all in sync). Also, I use only public/private keys for authentification using ssh-agent and ssh-add. I found it very cumbersome that everytime I want to ssh to see if ssh-agent is already running, then if it's not, ssh-add the key, and type that long command. Here is the command that I actually type to get into one of my hosts:

ssh rsavu@host1 -p 8722

The problem is I don't have any short hosts like host1 in /etc/hosts and I just want to make a script that automates this task (okay, admit I need it just for the sake of argument).

What should the script do? Well, if it receives an argument (user@host is necessary) it should connect to that host using the port 8722. If it doesn't receive any arguments it should print a menu with known hosts.

What to improve on in the next parts

  • check if the format of the first argument is user@host
  • read hosts from /etc/hosts
  • read all other options from a configuration file that can be thrown through a command line argument or be a predefined one
  • suppressing any warnings
The script

#!/usr/bin/python
"""
That thing above is called a shabang line for anyone that did not know that
It instructs the shell what interpreter should be used for the following
lines of code
"""

"""
These are the libraries we are going to work with.
"""
import sys
import os
"""
The main function
"""
def main(argv):
# First let's find out if ssh-agent is working
pid = os.system("pidof -s ssh-agent")
if pid == 256:
os.system("ssh-agent")
os.system("ssh-add")
# Let's see how many arguments we have
argc = len(argv)
# Test if we don't have any argument
if argc == 1:
# This is a list
knownHosts = ["user@host1", "user@host2"]
printTable(knownHosts)
# Request some input from the user and transform it in an integer
option = int(raw_input("Choose an option: "))
remoteHost = knownHosts[option-1]
elif argc == 2:
remoteHost = argv[1]
cmd = 'ssh ' + remoteHost + ' -p 8722'
print cmd

"""
Prints a table with know hosts
"""
def printTable(knownHosts):
i = 1
for host in knownHosts:
# In the next line the statement `i` makes us able concat a string and int
print `i` + ". " + host
i = i+1

"""
This basically means that if this file is ran independently and not included
in any other file it should call function main with that argument.
More on this another time
"""
if __name__ == '__main__':
main(sys.argv[0:])

Friday, September 21, 2007

Htop in FreeBSD

I've always loved the top replacement named htop that's available in linux. I usually run my screen session with rtorrent, mc and htop opened. I was a bit dissapointed where the usually nitty-gritty method of installing software in FreeBSD (using the ports collection) has failed me when trying to get htop working on my server.
Here is a quick reminder for me (and everyone else for that matter) on how to get htop working on FreeBSD along with the linux compatibility layer.

First you have to dynamically load the linux object in the kernel:

kldload linux

Then we have to make this loading permanent so add linux_enable="YES" to /etc/rc.conf.

After this, install a linux layer:

cd /usr/ports/emulators/linux_base-fc4 (for some strange reason fc6 is not working for me)
make install distclean

Go to /etc/fstab and add the following line:

linproc /compat/linux/proc linprocfs rw 0 0

Mount the new filesystem: mount linproc and go to /usr/ports/sysutils/htop and install as usual.

As soon as I figure out a method of getting a screenshot from my box I will post it :D

Bye for now.

Sunday, September 9, 2007

Thwarting SSH Attacks

Oh my gosh! These SSH attacks are getting worse by the minute. A few months ago I found that one of my accounts on my desktop was hacked and was sponsoring bandwidth to some IRC bots and abusive scanning. The problem was that I had setup a user with a lame password for a friend of mine so he could get used to the linux command line. Even though I asked him to change the password, he didn't and that resulted in a complaint from a server to my ISP. Having investigated a little I found a huge auth.log with some brute-force attempts at ssh password.
Yesterday I started my ssh server on the laptop and because I was very busy I left the laptop running. Today I come home to find a 300K /var/log/auth.log file (which in my opinion - for a freshly installed box with 22h of uptime is a lot). Something had to be done. I hardened my sshd config and searched for something to throttle down the attacks.

Securing SSH

Installing ssh is a breeze. Just type pacman -S openssh, add sshd to your DAEMONS line in /etc/rc.conf.
Now let's take a look at our sshd config and see what we can do to harden our existing installation.
sudo vi /etc/ssh/sshd_config

  • Delete the comment before #Port 22 and let's give it something like 2222.
  • The protocol should be always set to Protocol 2 because Protocol 1 is insecure
  • LoginGraceTime 30
  • PermitRootLogin no. Actually it is better to disallow root from the securetty file (more on that later).
  • PasswordAuthentification no as you only want people to log in if they have a private key. (more on that subject later)
  • Banner /etc/issue.ssh - Put some text in this file - something like: Unauthorized access prohibited. Any activity will be logged.

Saturday, September 8, 2007

SSH attacks

Oh my gosh! These SSH attacks are getting worse by the minute. A few months ago I found that one of my accounts on my desktop was hacked and was sponsoring bandwidth to some IRC bots and abusive scanning. The problem was that I had setup a user with a lame password for a friend of mine so he could get used to the linux command line. Even though I asked him to change the password, he didn't and that resulted in a complaint from a server to my ISP. Having investigated a little I found a huge auth.log with some brute-force attempts at ssh password.
Yesterday I started my ssh server on the laptop and because I was very busy I left the laptop running. Today I come home to find a 300K /var/log/auth.log file (which in my opinion - for a freshly installed box with 22h of uptime is a lot). Something had to be done. I hardened my sshd config and searched for something to throttle down the attacks.

Saturday, September 1, 2007

Work in Progress

I'm sorry because I haven't updated this page in a very long time. The truth is I've been very busy going out on vacation and getting ready for my sister's wedding. Now I'm preparing my exams (I have failed several courses ... but that's okay) and after the 12th of September please check my blog out as I'm preparing some hot new stuff. I will be installing qmail on my FreeBSD server, securing it because it must go into production. New articles will pop out soon.

Tuesday, July 17, 2007

Archlinux setup tutorial

Today I am going to write a quick tutorial on installing and getting a working system using Archlinux. I believe that this is one of the best distributions available, if you are willing to work and start learning something about the fascinating Linux world. As a Slackware user for almost 5 years, I recently switched to Arch because I think that it has some very interesting features that lack in Slack, such as a great package manager and platform specific compiling (it is built for the i686 platform). You get all the nifty features like bleeding-edge packages and standard 2.6 kernel (hehe slack) but you still control the operating system. So, without further ado, let us begin.

Getting the ISOs

I just grabed a copy from my local mirror and burned it on a CD. I only got the base system iso as it is faster to download and I always get packages through pacman. Leave the CD in the tray and reboot your system. Following the instructions on the screen you should get a command prompt:

[Arch Linux: /]#

Partitioning

I have my hdd already partitioned and I won't get into technical stuff such as partitioning your drive. You get fdisk and cfdisk for that and there are plenty of tutorials available on google for such. Anyway, here is my hdd layout:

/dev/sda5 - / - 10GB
/dev/sda6 - /boot - 1GB
/dev/sda7 - swap - 3GB (I know that it's not necessary to have such a big partition for swap but I also use my box as a server)
/dev/sda8 - /usr - 15GB
/dev/sda9 - /home - 15GB (you will download por.... ahem ... pro... grams won't you :) )

Basic setup

Okay. At the prompt just type in /arch/setup and you should be welcomed by a dialog based installation program.

1. You are prompted to choose your installation media. I usually (I mean always) go for option 1 - CD-ROM or OTHER SOURCE

2. Prepare hard drive

  • I only go for option 3 and assign mount points to my partitions. I choose ext3 for my filesystem although I believe that xfs is better than ext3 (bad habits die hard).
  • Be careful that you first have to choose your swap partition.
3. Select packages. As I only downloaded the base ISO, guess how many options I have:)
4. Install packages - pretty straightforward. I do not choose to keep the packages in cache as I won't have any further use for them.
5. Configure system - use nano or vi to your liking (I recommend nano if you want just easy editing)
  • Use hwdetect
  • No booting from usb devices (at least in my case)
  • No fireware
  • No pcmcia devices
  • No nfs shares
  • No software raid arrays
  • No lv2m
  • No encrypted volumes
  • No custom DSDT files
  • /etc/rc.conf - this is your general config file so be careful what you write in it
  1. Timezone - i change mine to Europe/Bucharest
  2. MOD_BLACKLIST=(nvidiafb) - I add this since nvidiaframe buffer gives me an error while trying yo compile my nvidia graphic card
  3. HOSTNAME="something"
  4. Modify eth0="eth0 ip_address netmask subnet_address broadcast broadcast_address"
  5. Modify gateway with your default gateway and be sure to delete the preceding ! on ROUTES=(!gateway) as this disables the gateway (nasty)
  • hosts - add your host that you put in the HOSTNAME variable in /etc/rc.conf (above)
  • /etc/resolv.conf - add your nameservers or you can just opendns
  • locale-gen - uncomment the line with en_US.UTF-8
  • Set the root password
  • Choose the mirror closest to you
6. Install the kernel - you only have one option here too
7. GRUB is okay for me - but I have to uncomment the Windows lines :-S... sorry guys ... hem... not me :)

Now go ahead and reboot. All should be fine.

Adding a user

Just type adduser at the command prompt and follow the instructions on the screen. Please be advised that I use a sudo environment and as such, a good password for the username is necessary.

Upgrading the system

just run pacman -Syu at the command prompt. It will take a while (not that much really because there aren't so many packages installed yet).

Sudo environment

As I believe that the Ubuntu philosophy regarding using sudo is very good, on all my systems I get sudo up and running. Here is how:

pacman -S sudo
Run visudo after that and just below root ALL=(ALL) ALL add user ALL=(ALL) ALL. Be careful please as this implies that the specified user will have all the privileges root has.

Xorg setup

It is as simple as

sudo pacman -S xorg

After that all you need to do is generate an /etc/X11/xorg.conf. I like the nvidia setup tool for Xorg so let's go ahead and install some proprietary drivers.

sudo pacman -S nvidia
sudo nvidia-xconfig
cp /etc/skel/.xinitrc ~

Now let's edit the xinitrc file and delete the comment before exec startkde (as we will be using kde).

KDEMOD

Kdemod is a modular and patched version of KDE for Archlinux. It's really great. All you need to do is to edit the pacman file:

sudo vi /etc/pacman.conf
Add at the end
[kdemod]
Server = http://kdemod.ath.cx/repo/current/i686
sudo pacman -Syu
to get the list for the kdemod repository
sudo pacman -S kdemod - go get a cup of coffee or something as this surely takes a while
sudo pacman -S kdemod-kdebase-kickoff
sudo pacman -S kdemod-kdebindings
sudo pacman -Rd libbeagle
sudo pacman -S kdemod-kerry
sudo pacman -S kdemod-beagle
sudo pacman -S kdemod-applets kdemod-tools
sudo pacman -S kdemod-kdeutils-kcalc kdemod-kdeadmin
sudo /opt/kde/bin/apply_kdemod_theme


Accessing your NTFS partition

Okay guys I'm guilty. I do have some ntfs partitions on my desktop. Here is how to access them:

sudo pacman -S ntfs-3g
sudo modprobe fuse
Add fuse to your /etc/rc.conf MODULES part
Edit your /etc/fstab file
Add the line:
/dev/sda1 /mnt/sda1 ntfs-3g defaults 0 0
And then let's remount all the drives (but be sure to create /mnt/sda1 first)
You now have read-write access to your ntfs drives.

Let's listen to some music

sudo pacman -S alsa-utils alsa-lib alsa-oss
sudo alsaconf
sudo alsamixer
sudo alsactl store
gpasswd -a user audio

Also be sure to add alsa to the DAEMONS line in /etc/rc.conf (you have to edit it as root).

Tips and tricks

  • Let users use usb sticks
gpasswd -a user storage
gpasswd -a user optical
  • Settings for firefox:
Proportional: Serif 16
Serif: Times New Roman
Sans: Arial
Monospace: Courier New 13
Minimum font size: 13
  • Settings for KDE
Go to Control Center. Replace color with cleanstick-black-font (you can find it on kde-look.org). Replace style and Window Decorations with Plastik.

  • Add hal to DAEMONS in /etc/rc.conf

Software ( great stuff to install )

sudo pacman -S firefox
sudo pacman -S ttf-msfonts ttf-cheapskate artwiz-fonts
sudo pacman -S amarok-base
sudo pacman -S rtorrent
sudo pacman -S acroread
sudo pacman -S jre
sudo pacman -S openoffice-base
sudo pacman -S screen
sudo pacman -S smplayer
sudo pacman -S flashplugin
sudo pacman -S pidgin

Well that's about it for tonight. Tomorrow we take a look at some of the config files for different programs. Yes I admit most of this stuff you could find on the Archlinux Wiki but I thought that bringing all of these together combined with my own experience of using Archlinux could be somewhat interesting.

Sunday, July 8, 2007

Very basic FAMP (Freebsd, Apache, MySQL, PHP)

As you may already know, I installed FreeBSD 6.2 last night. One of the primary uses of my machine is a web server complete with PHP and MySQL.

Installation is pretty straight-forward.

Apache 2.2


cd /usr/ports/www/apache22
# If you don't know where it is just do a make search name=apache22
make install clean
mkdir -p /var/www/htdocs
chgrp -R www /var/www/htdocs
chown -R www /var/www/htdocs
# Let anybody in the group add new documents
chmod g+w -R /var/www/htdocs
# Add myself to the www group
pw user mod my_user -G www
# Let's configure the damn thing
vi /usr/local/etc/apache22/httpd.conf
# Changed DocumentRoot to /var/www/htdocs
# Changed ServerName to http://my_private_adress:80
# Changed ServerAdmin to my email address
# Changed AllowOverride All (as
# anybody can modify their directories with .htaccess)
# Now let's start it
/usr/local/sbin/apachectl start
# And add it to /etc/rc.conf to start automatically on every
# system boot.

echo 'apache22_enable="YES"' >> /etc/rc.conf


MySQL 5.1


cd /usr/ports/databases/mysql51-server
make install clean
rehash
# Let us start the database installer
mysql_install_db --user=mysql
chown -R mysql /var/db/mysql/
chgrp -R mysql /var/db/mysql/
/usr/local/bin/mysqld_safe -user=mysql &
# Start it every time the system starts
echo ‘mysql_enable=”YES”‘ >> /etc/ rc.conf
# Change the root password
mysqladmin -u root password newpassword
# Copy the config file
cp /usr/local/share/mysql/my-small.cnf /var/db/mysql/my.cnf
# Add another user (it's generally not a good idea to work with
# root)

mysql -u root -pnewpassword
mysql> GRANT ALL PRIVILEGES ON *.* to 'user'@'localhost' IDENTIFIED BY 'another_password'
mysql> quit


PHP 5.2


cd /usr/ports/lang/php5
make install clean
# You have to choose the option for Apache 2.2
cd /usr/ports/lang/php5-extentions
make config
# Choose Mysql, GD, Zlib, PDF, Mbstring and any other extension you would like
make install clean
# Apache configuration
# After all the LoadModule lines add:
AddType application/x-httpd-php .php
AddType application/x-httpd-php-source .phps
DirectoryIndex index.html index.php
# Uncomment the Include etc/apache22/extra/httpd-userdir.conf line
# You now have a per-user web account in /home/user/public_html
# Restart apache
apachectl restart


All is done. Have fun. By the way, you can copy stuff from the outside with scp (you did remember to let ssh connection didn't you?)

FreeBSD 6.2

Although I had FreeBSD 5.2 i decided to install the new version FreeBSD 6. I wanted a clean install (as I really didn't have any important stuff on my server and I had a lot of time to spare). I downloaded the first cd off ftp.ro.freebsd.org
and started the sysinstall utility. I chose a standard instalation with auto partitioning of my 34GB drive (as the 17GB one I'm saving for the Document Root of the webserver and for the /home directories). The installation crippled when copying GENERIC (maybe the media was faulty) and because I didn't have any other blank CDs in my room I decided to try the FTP install. What do you know! I changed the network card on my server and the guys from my ISP make MAC-based authentification. Oh no! What am I supposed to do? Maybe this is just not my night for installing FreeBSD. I luckly found somebody from my ISP online (it was almost 1 AM) and requested my MAC address from their database. I went to the Fixit menu and made a emergency shell on tty4. Yupee! Who knows, maybe I will get lucky after all.


# ifconfig fxp1 ether 00:00:00:00:00:00 <- (my real MAC here)


(Don't you just hate the way freebsd sees your devices?)

As FreeBSD doesn't require to take down the interface for changing MAC address I jumped to my instalation screen (Alt+F1 btw), entered my IP configuration and from then on everything went smoothly. I no time I was sitting in front of a command prompt.


#


Pretty ugly since I am used to my bash shell with auto-completion and pwd. This could be fixed in no time:


# pkg_add -r bash
# chsh -s bash
# bash


Ah, much better now. The next step was to install some dearly applications to me: sudo and screen. But where are they?


# cd /usr/ports
# make search name=sudo
Path /usr/ports/security/sudo
#make search name=screen
Path: /usr/ports/sysutils/screen
# cd /usr/ports/security/sudo
# make install clean
# visudo
Added user ALL=(ALL) ALL after root
# cd /usr/ports/sysutils/screen
# make install clean


That was it. Beautiful and simple.

I then logged out of my machine and entered as my user. Sudo is really beautiful. I started to get the hang of it while I was testing Ubuntu and I consider it a really neat ideea. Screen is just one of those app that you can't live without while running a headless server over ssh. Maybe I will come back with a tutorial on screen in a future post.

FreeBSD is just simple and neat. Although I never tested it as a desktop operating systems, I always found it as a very nifty OS for servers. I will come back later with some more tutorials on other things I did since install.

Tuesday, July 3, 2007

Slackware 12

A aparut Slackware 12. Primele noutati pe care le-am vazut ar fi un kernel default din branch-ul 2.6 (mai precis 2.6.21.5) - ultimul conform kernel.org, KDE 3.5.7, XFCE 4.4.1, HAL (o adaugire mai mult decat asteptata intrucat dbus si hal sunt absolut indispensabile in folosinta cea de toate zilele in KDE) si udev. Din pacate, inca nu exista un packet manager decent, rapid, stabil si oficial (in stable si nu in extra). Desigur exista swaret si slackpkg dar sunt cu cativa ani in spatele portage, aptitude sau chiar pacman .

Din cate vad, Slackware in sfarsit vine cu pachete la zi (de la kernel pana la browser sau suita office) dar in fata unor distributii ca ArchLinux (destinat utilizatorilor mai "copti" in ale Linuxului) sau Ubuntu (destinat incepatorilor) incepe sa-si piarda din savoare. Da! Recunosc, Slackware este inca dupa parerea mea printre cele mai bune distributii, dar pur si simplu nu mai am timp pentru a sta sa compilez si sa bibilesc sistemul pentru a-l aduce la o forma cat mai apropiata de gustul meu.

Ca parte buna, nu pot sa nu remarc timpul scurt de aparitie al versiunii cu numarul 12. Dupa ce versiunea 11 am asteptat-o cu infrigurare in suflet peste 2 ani, in sfarsit lucrurile s-au miscat mai repede, poate si datorita faptului ca acum distributiile sunt semnate "Pat and the Team".

Incercati-l de aici:
ftp://ftp.evolva.ro/linux/slackware/slackware-current-iso/

O sa-l il testez in curand si o sa revin cu niste "food for thought" dar pana una alta cred ca am gasit distributia mea de suflet.

Sunday, June 24, 2007

ToolBox part II

Programe absolut indispensabile:

  1. ForecastFox (util pentru cei care stau intr-un bunker si vor sa vada vremea de afara)
  2. StumbleUpon (am crezut ca-i inutil dar pana la urma m-am convins, l-am instalat si am inceput sa fiu dependent)
  3. Extended Statusbar (o ramasita de cand foloseam opera)
  4. FireBug (as baga-o obligatoriu in programa scoalara de invatat pe dinafara, really cool stuff)
  5. Firefox Google Bookmarks (o modalitate de a-ti tine linkurile intr-o ordine desavarsita - nu-l folosesc niciodata ci pur si simplu arunc linkurile in bookmarks ... asteptand sa-mi intre in rutina zilnica folosirea lui).
  • VIM - the best editor around - programare Python, Java, C, fisiere de configurare. O sa revin cu o lista de pluginuri. Pana atunci: amix.dk
  • Mplayer - cel mai tare video player
  • Pidgin
  • rTorrent
  • Screen
  • OpenOffice
  • Amarok - am crezut ca e bloated, ca nu e ca winamp etc... dar are niste functii atat de interesante incat dupa ce-l folosesti cateva zile te indragostesti de el (printre care - global shortcuts, lyrics, collection)

ToolBox

Iata si hardwareul pe care imi pierd ziua.

Un calculator uzat moral si tehnic pe post de desktop si proptea de picioare :)

  • AMD Athlon XP 2000+ (as fi vrut eu Intel)
  • Placa Epox 8rda3+ (de asta eram chiar mandru)
  • Geforce FX5200 128MB, 64biti
  • 1GB RAM 333MHz (cersiti de pe la diversi, un ghiveci)
  • 2x160GB HDD depasiti de lacomia mea de a downloada diverse lucruri inutile si a uita sa le sterg (un Seagate si un Western am impresia)
  • Un monitor strident SyncMaster 753s CRT care vine insotit de dureri mari de cap :)
  • Boxe Logitech X530 (mersi baieti ... pacat ca voi v-ati luat monitor de restul de bani)
  • Distributie: ArchLinux Duke
  • WM: Kdemod (KDE on steroids)
Un laptop Fujitsu-Siemens cu mari probleme (pentru ca e FS)
  • Amilo Pro v2065
  • Specificatii neimportante gen placavideo, ram, si altele
  • Distributie: ArchLinux Duke
  • WM: Kdemod (pur si simplu rocks!)
  • nu-mi place pentru ca se strica des, are materiale proaste si i-am mai facut si o gaura in panelul LCD din cauza manipularii defectuoase (deh ... am uit ca nu facut pentru salahori ca mine)
Un server (tot Fujitsu-Siemens) Primergy C150 vechi dar care imi foloseste si pe post de noptiera
  • 320 SDRAM ECC
  • 17GB HDD SCSI
  • 34GB HDD SCSI
  • Procesor Intel Pentium 4 2GHz
  • Placa video ATI Radeon (o minune pentru snake in consola)
  • Un monitor de 15" (folosit rar la configurari)
  • Sistem de operare: FreeBSD 6.2
  • Are rol de web server, firewall, ftp server, nas, mysql server etc
Astept un KVM, un router wireles WRT54GL si orice alta bucatica de tehnologie oricat de veche care imi vor face ochii sa sclipeasca.

RecordMyDesktop

Am gasit un mic utilitar pentru a captura ecranul in format ogg.
Se numeste recordmydesktop si pana acum mi se pare foarte usor de folosit, creand capturi de dimensiuni mici (aprox 2MB pentru un minut). Cu toate astea, am senzatia de captura prea rapida totul miscandu-se foarte repede.

Desi se gaseste si in ArchLinux repository am preferat sa-l compilez din surse.
Cum se foloseste:
recordmydesktop -fps 30 -o test.ogg